
Just recently my colleague Tracy De Cicco and I published our thoughts around how to gain greater visibility into retail supply chains to help eliminate child labor practices out on LinkedIn. Be sure to check it out http://bit.ly/2i0CNfE

Latest posts
Just recently my colleague Tracy De Cicco and I published our thoughts around how to gain greater visibility into retail supply chains to help eliminate child labor practices out on LinkedIn. Be sure to check it out http://bit.ly/2i0CNfE
As we all know time to market is everything when you are trying to get people excited about your next great application. To help you reach global markets faster you can now access the Globalization Pipeline service directly the Atom editor and get your application quickly translated into multiple languages without even leaving the editor. This is a great time saver and let’s your developers stay focused on their code without having to continuously worry about zipping up files, shipping files to translators, and waiting around for your returned files.
Here is how to get started:
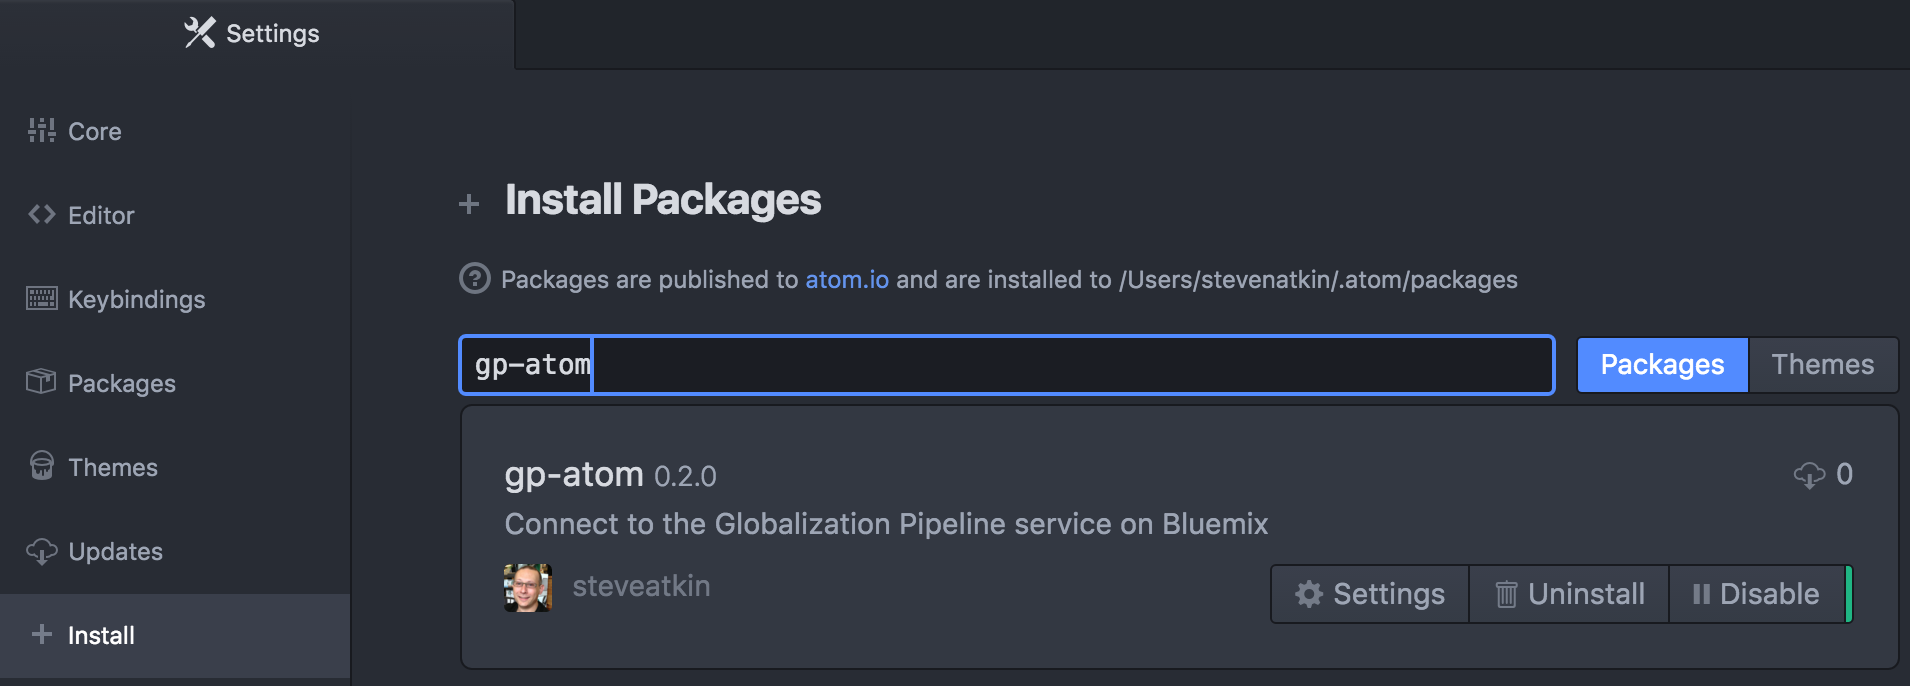
Install gp-atom in Atom

Settings gp-atom
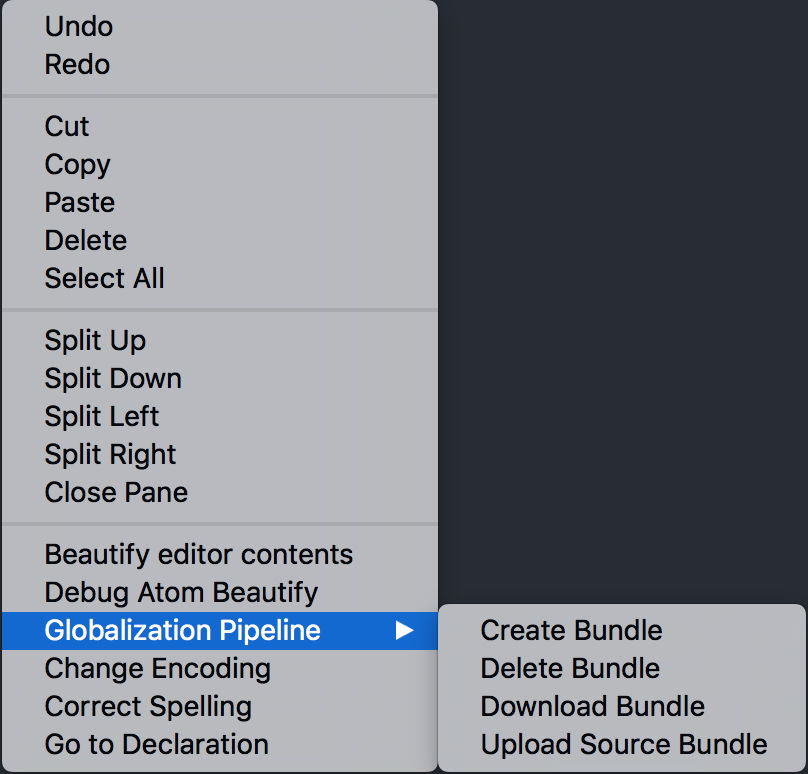
Context menu

Create bundle
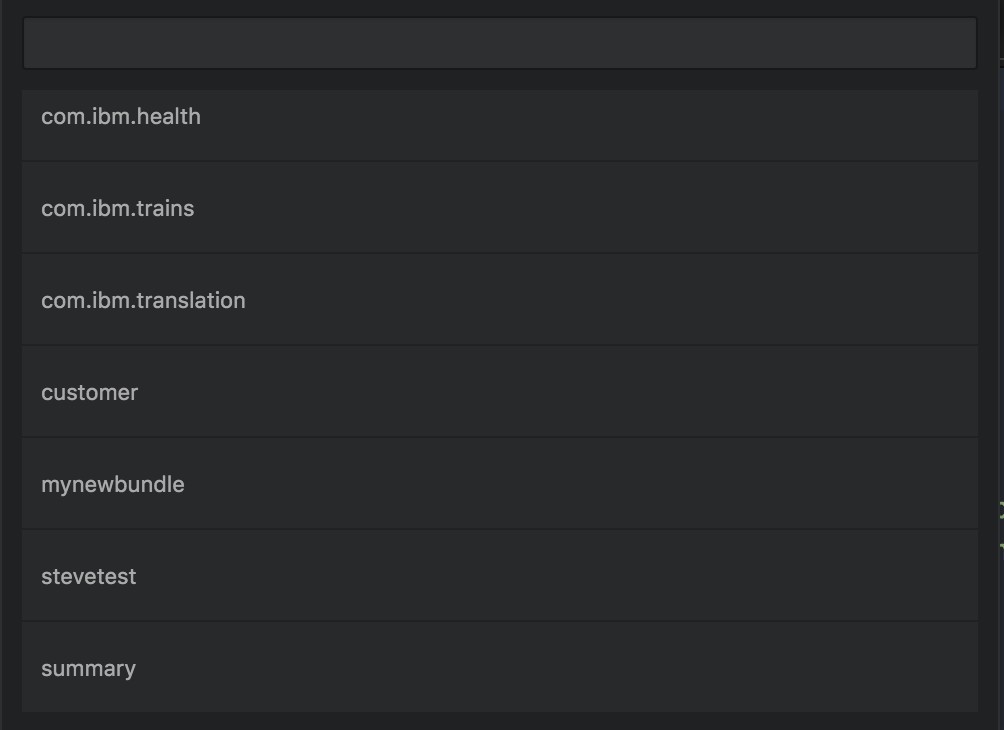
Bundle upload
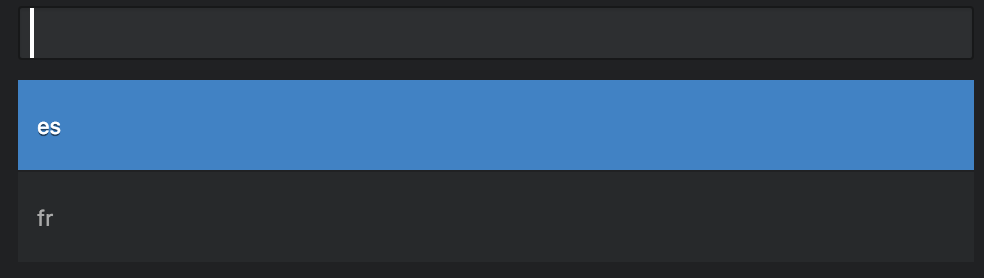
Select language
I hope this post helps you get started with using the Globalization Pipeline service from IBM Bluemix directly from the Atom editor.
With all the excitement about the Globalization Pipeline service on IBM Bluemix we are thrilled to share with you a new extension we have created for Microsoft Visual Studio Code that lets you access the service directly from the Visual Studio Code editor. Checkout this short video on how to get started using the extension.
One of the cool new features in Watson Conversation in IBM Bluemix is the ability to support a global audience by creating language specific versions of your bots. In this blog post I will give you some best-practices for creating bots in other languages.
To create a bot in a language other than English simply select the language from the pulldown for your workspace as shown below.
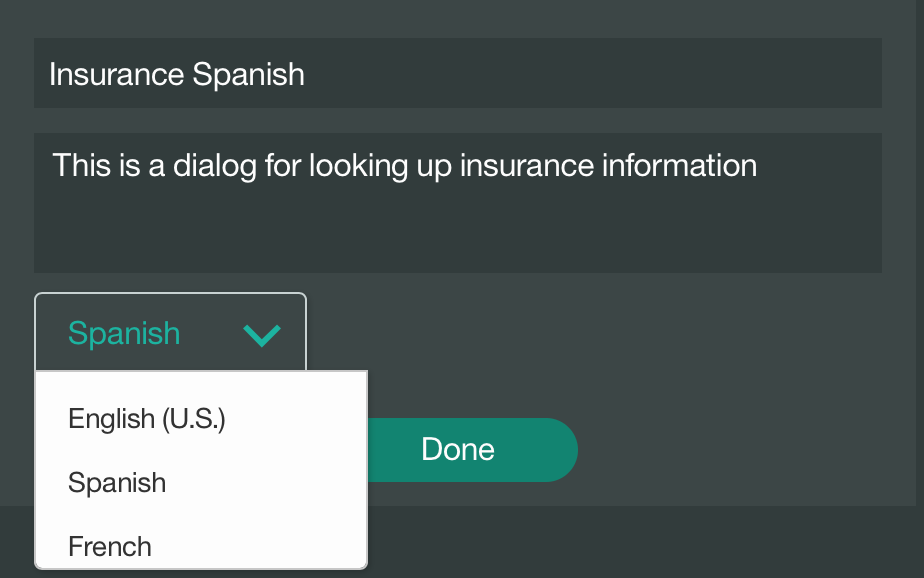
Select Watson language
Now that you have your workspace configured for your desired language you can start creating the intents and entities.
When you create your intents you need to avoid using message fragments. You should create complete sentences. For example, in my Spanish insurance bot I use the complete sentence “Localizar mi póliza” rather than the message fragment “Localizar mi” as shown below.
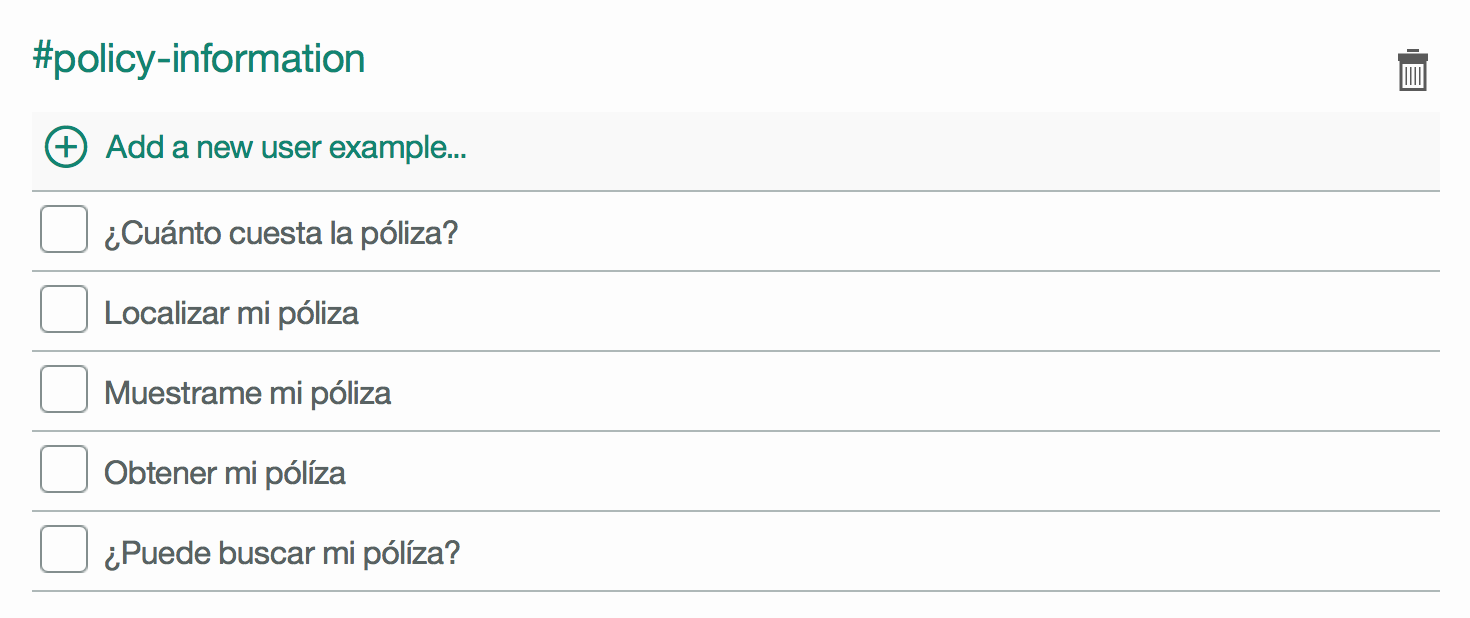
Watson intents
It is important to use complete sentences for Watson Conversation’s training engine to work correctly. You may be asking yourself at this point if you need to create a separate sentence for every synonym of “póliza”. The good news is that this is unnecessary. You simply list all the possible synonyms associated with “póliza” on the entities screen. So in my case I defined a few synonyms for “póliza” as shown below.

Watson entities
When you define your conversation nodes you simply indicate the intent and entity to use in the dialog. In my case I set my node to use the #policy-information intent combined with the @policy entity as shown below.
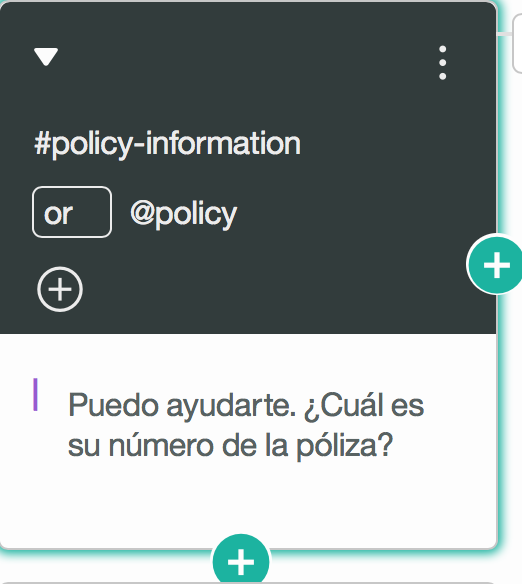
Watson dialog
I hope this post helps you quickly get going with creating multilingual conversational bots using Watson Conversation.
With the recent arrival of Watson Conversation on IBM Bluemix, developers are wanting to generate very sophisticated conversational bots that need to collect input and record state. In this blog post I will show you how to accept input in a conversational dialog and record state changes in your conversation.
After you have created your intents and entities in Watson Conversation you will want to start to create your dialog. The first question that developers immediately ask is how do you capture and then record the input of the user? To do this create a dialog node with a new condition called input.text as shown below.
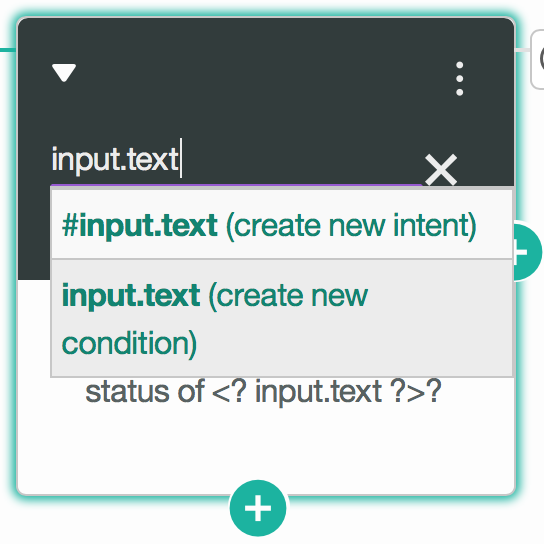
Dialog with input.text condition
This node will record the user input and make it available as input.text. If you want to echo this input back to the user then you can use simply surround the condition with <? and ?>. So in this case we would use <? input.text ?> to repeat the input back to the user.
Now what do we do if we need to return the input value back to our calling application. How do we return the value? To return the input we will use a context object. To create a context object, switch to the “Advanced” view in the node by clicking on the three vertical dots in the right corner of the dialog node as shown below.
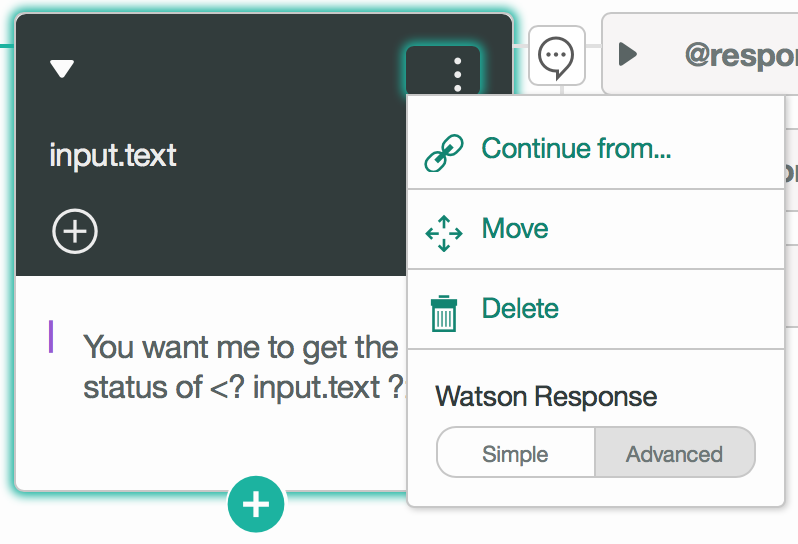
Selecting advanced node view
After you have the “Advanced” view displayed you will want to maximize the view by clicking on the “Maximize” button to make it easier for you to create and edit the JSON object as shown below.
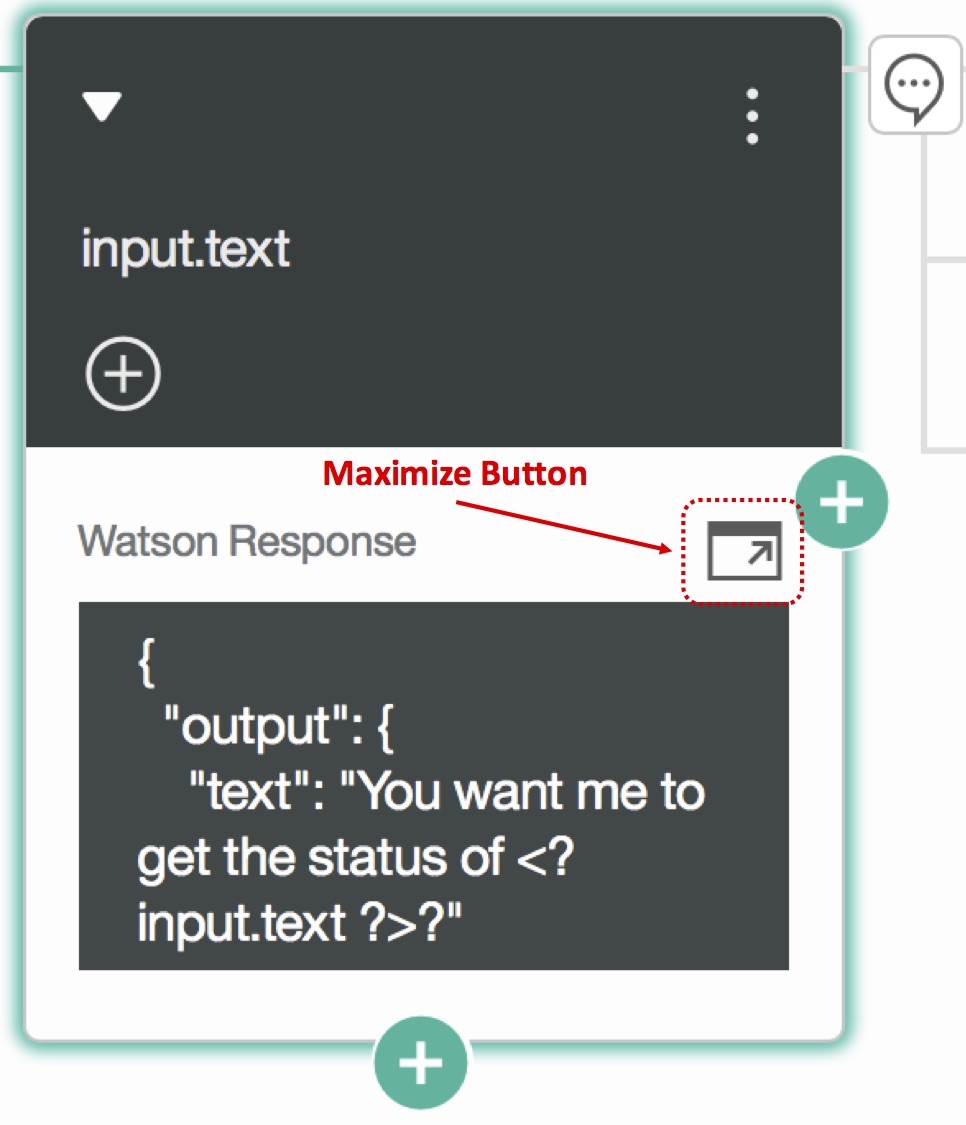
Maximize node
Now add a section called context as show below in the editor and select a field name that you will use to refer to the input.text. In this particular case I created a field called policy and return the value that was input by the user. From your calling application you can simply access the policy field from the context object that is returned by the Watson Conversation API.
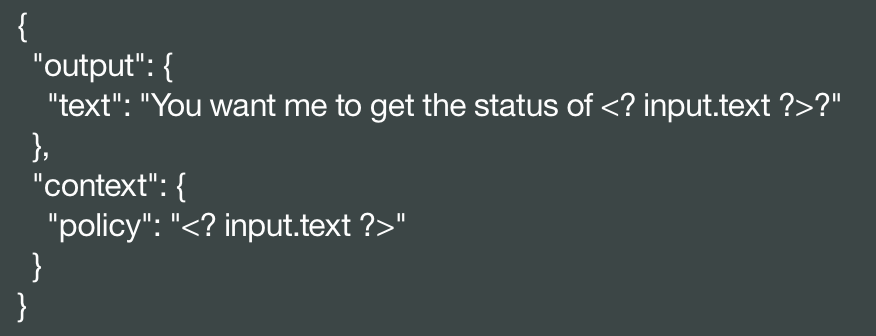
Advanced view
Now what happens if you need to refer back to your input.text later in your conversational dialog in one of your nodes. How do I access one of the fields from the context object? To do this let’s open up a maximized view of one of your nodes that needs to access one of your context fields as shown below.

Accessing context variables
As you can see, you can easily reference your context variable by preceding the context variable with a $. So in this case I access my variable through $policy. You will immediately notice that in the editor I have nothing in my context object and this is ok, as the context object I will be accessing is the one being used at run-time that was passed back to Watson Conversation through the API from your calling application. If I want to add more context variables I can do that at any time by simply adding more fields to the context object. Keep in mind that you can also replace existing fields by simply updating their values in the context object.
I hope this short post has helped you understand how to capture user input and carry state in your Watson Conversation bots.
One of the great features of the IBM Globalization Pipeline service on Bluemix is the ability to select the machine translation engine you want to use to translate your applications. This gives you great flexibility to choose the engine that gives you the best results for the type of application you are translating. Currently, you can select from both Watson Language Translation and Capita TI SmartMATE. In this short video I show you how you can quickly configure Globalization Pipeline to use Capita TI SmartMATE.
One of the biggest challenges with using cloud services is having to learn all the RESTful APIs that a service provides. Developers really want to be able to quickly integrate the use of a cloud service into their application without having to spend a lot of time studying a service’s Swagger docs. With the recent launch of the Globalization Pipeline service on IBM Bluemix the development team has made it very easy to get started with integrating the service into your application. The Globalization Pipeline service provides several open source SDKs in several programming languages such as: Java, Node.js, Python, and Ruby as well as plugins for Apache Cordova.
In some cases all you need to do is drop the SDK into your build and you are on your way to using the service. For example, if your application is a WebSphere Liberty application using Java 8 running on IBM Bluemix all you need to do is drop the SDK’s jar file into the extensions directory. Once you have included the jar file, then your application will automatically connect to the Globalization Pipeline Service without you having to even make any changes to your application code.
When it comes to mobile applications the SDKs have you covered here as well. You can easily include the Apache Cordova plugin in your mobile hybrid application and simply specify the Globalization Pipeline’s service credentials and then you are able to start using the service without having to directly make all the RESTful API calls yourself.
I hope this post helps you quickly get started with using the SDKs for the Globalization Pipeline service on IBM Bluemix.
I am thrilled to inform you that IBM Globalization Pipeline for Bluemix is now generally available on IBM Bluemix.
Using the IBM Globalization Pipeline service on Bluemix you can quickly translate your applications running on Bluemix into other languages while continuing to work within your DevOps/Continous Delivery infrastructure. The cool thing about using the Globalization Pipeline service is that you get to leverage the power of machine translation for rapid turnaround combined with the ability to make custom edits. Using the service is a snap especially when you utilize the service’s open source SDKs. In some cases, for example, the Globalization Pipeline SDK for Java, you don’t even need to make any changes to your source code to connect your application to the Globalization Pipeline service — simply recompile your app and deploy it on Bluemix and you’re ready to go.
Once your application is connected to IBM Globalization Pipeline, any translations that you request or edits to translations that you make, will be immediately available to your application. This means that you don’t need to recompile, repackage, redeploy, or even restart your application to see your translations. To learn more about the Globalization Pipeline service and see it in action checkout these videos.
This blog post is to let you know about some exciting news out on the IBM Bluemix Garage Method site. For those of you not familiar with the Bluemix Garage Method. The Bluemix Garage Method is all about digital transformation through rapid innovation and DevOps. The Bluemix Garage method gives you recommended methods, practices, tools, and insightful experiences to harness DevOps.
Now on to the breaking news!! Globalization is now part of the IBM Bluemix Garage Method. There are two new articles for you to take a look at that cover Integrated Globalization and the exciting Globalization Pipeline service on Bluemix. These articles explain how to incorporate globalization into your overall DevOps processes and show you how to break free from the old siloed model of translation where you have to sit around and wait for translation. So go and check out the articles and start building global cloud applications.
Many developers may be surprised to learn that services from IBM Bluemix can be called from environments other than IBM Bluemix. In this blog post I am going to show you how you can call the IBM Globalization Pipeline service on IBM Bluemix from Amazon Web Services (AWS) Lambda. So let’s get started.
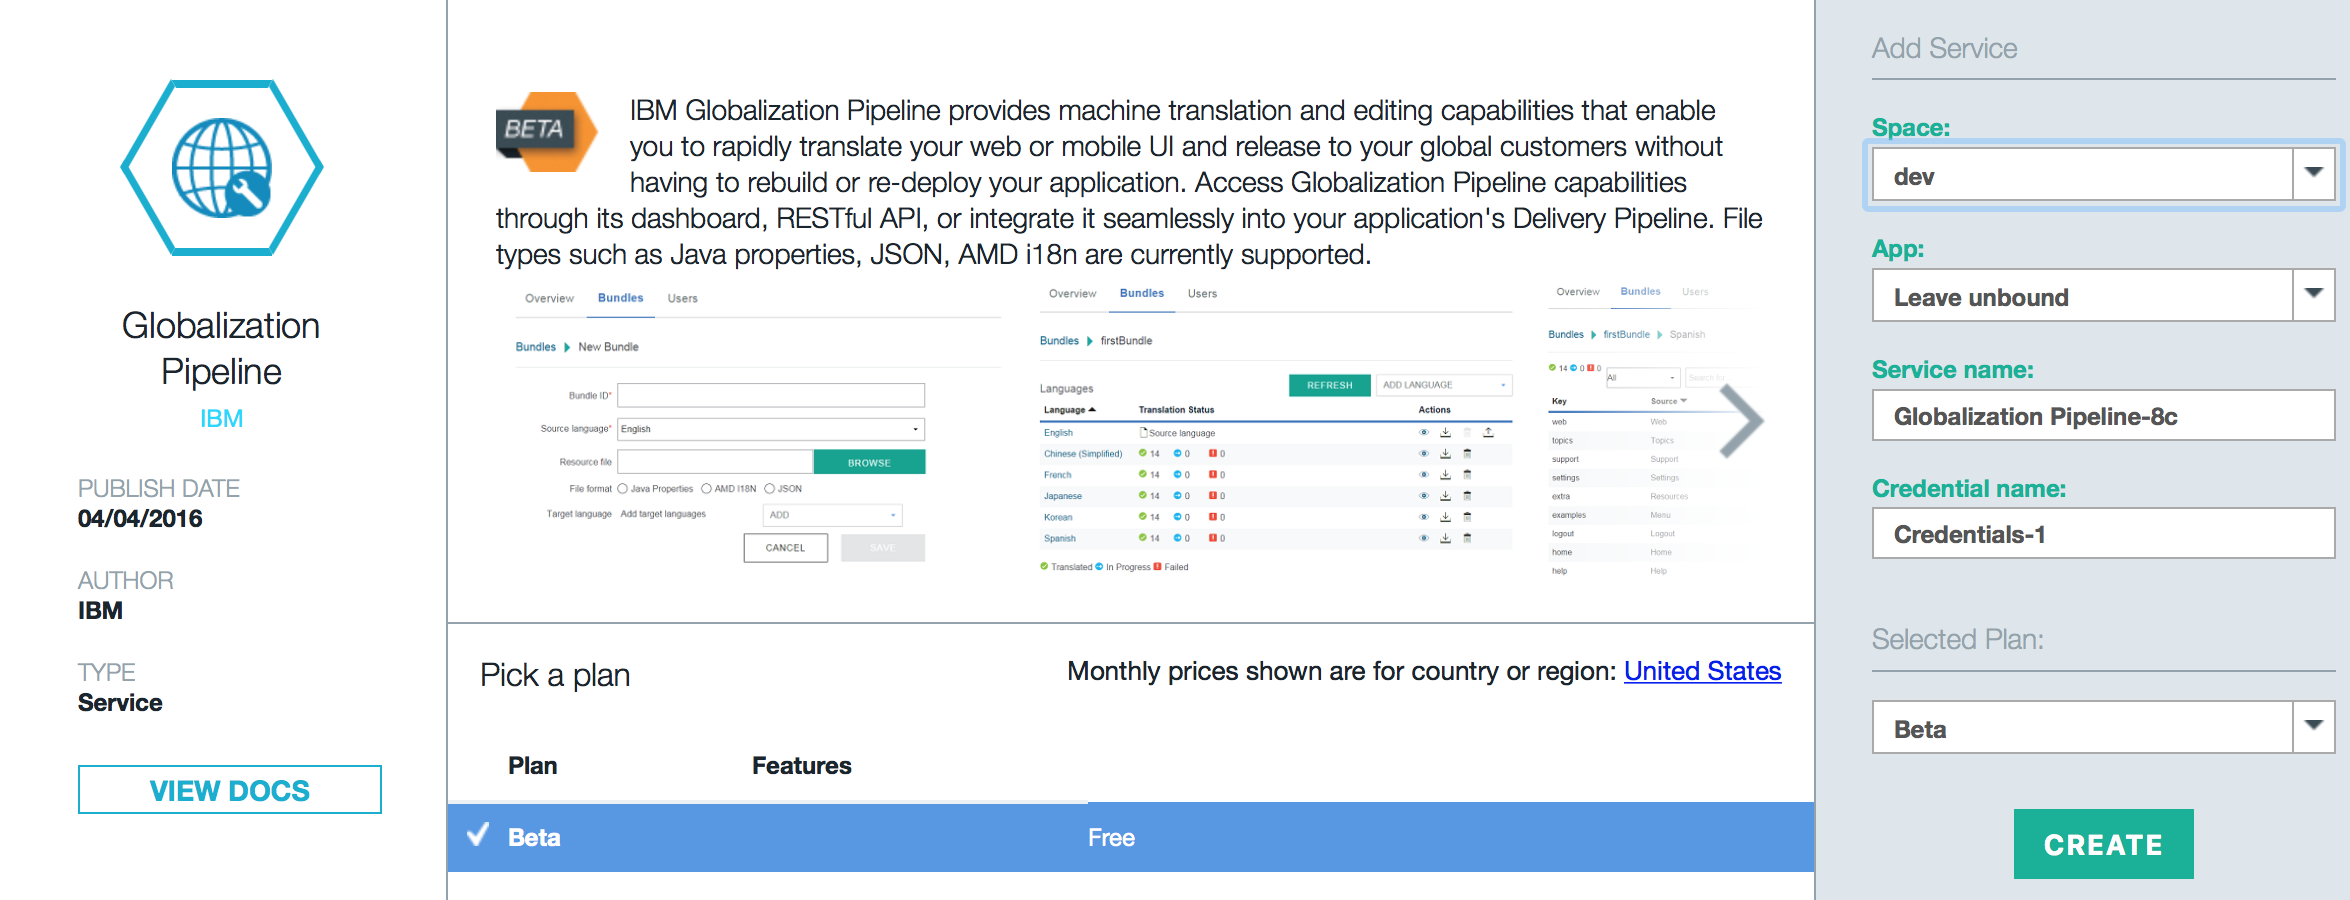
Unbound Instance of Globalization Pipeline Service
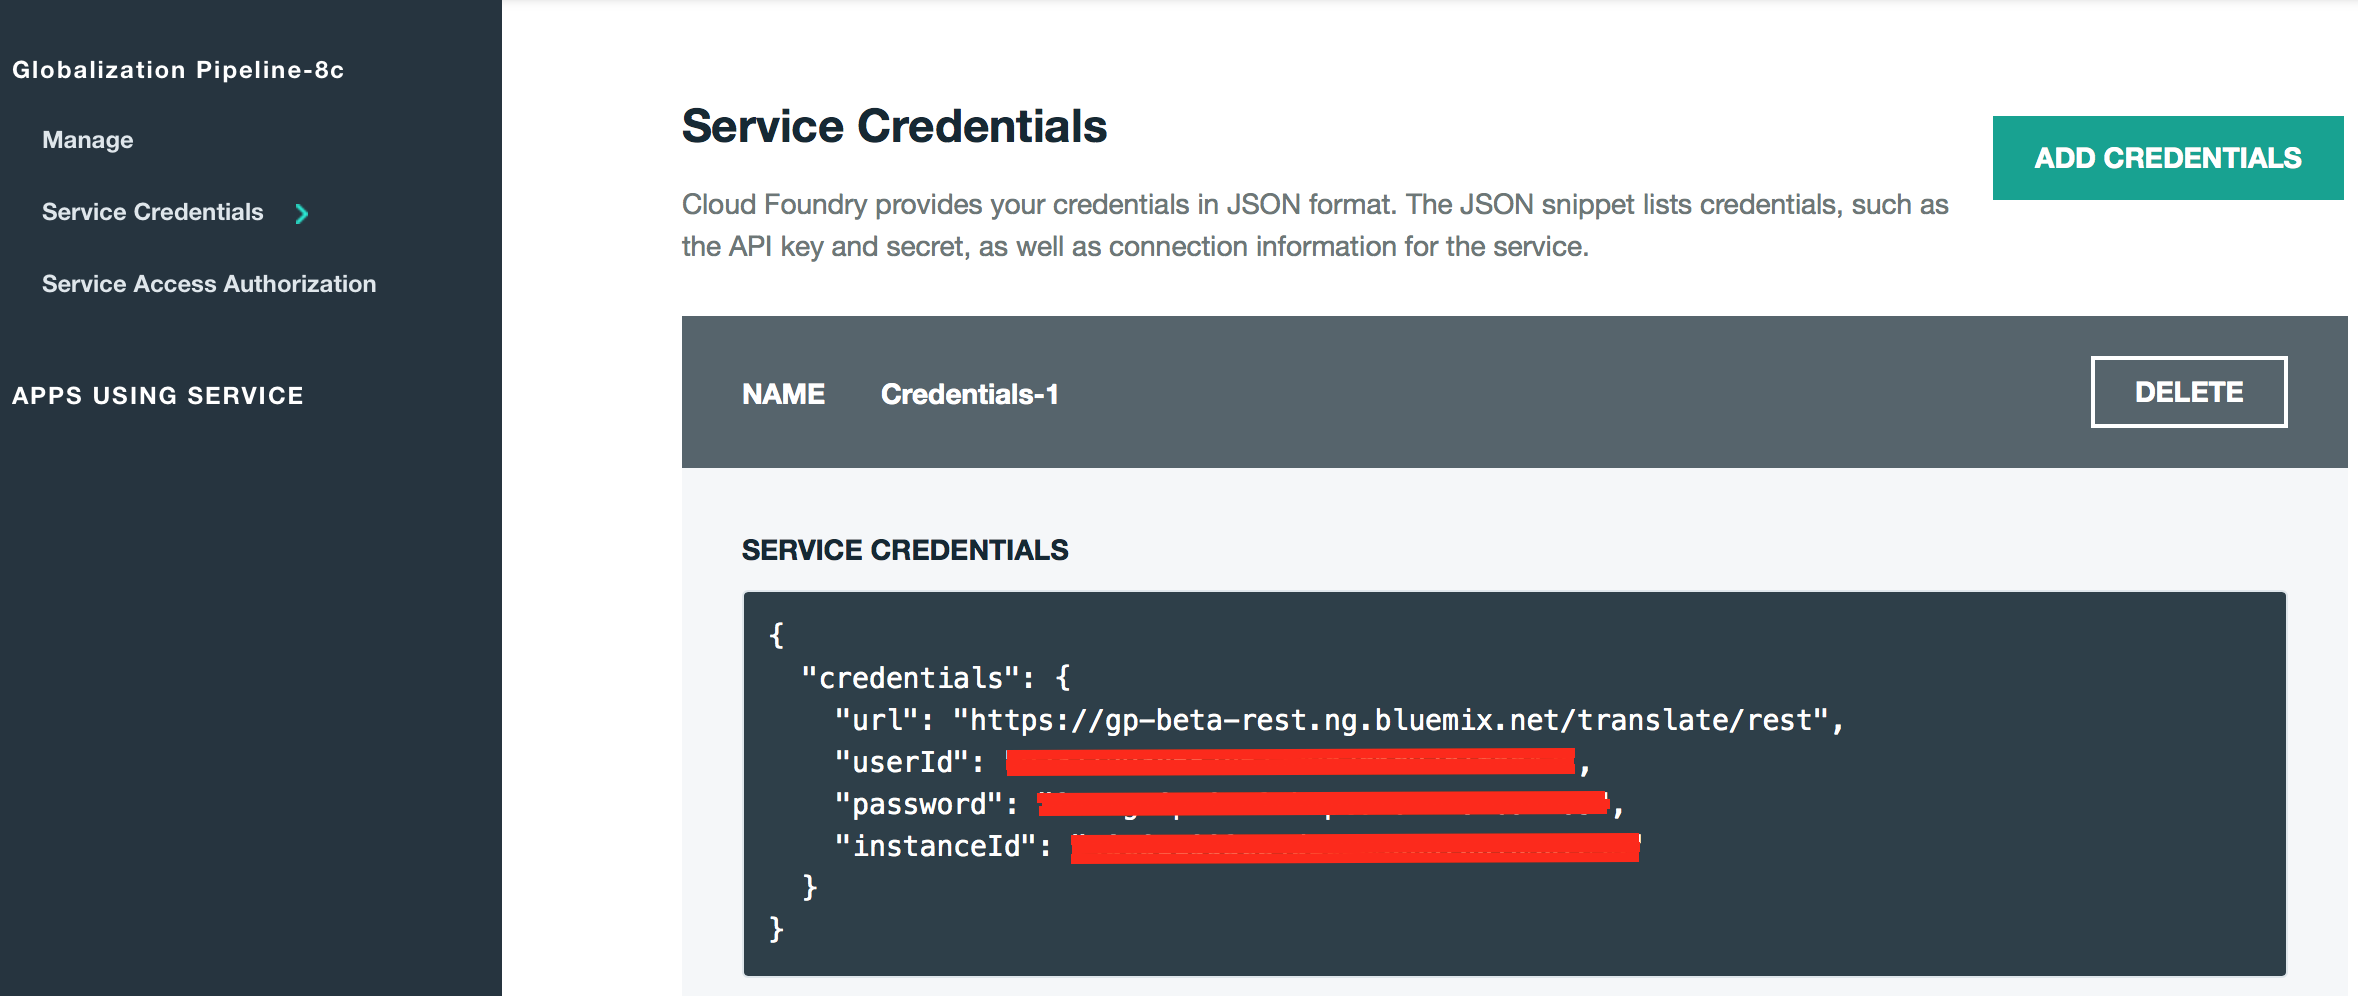
Service Credentials
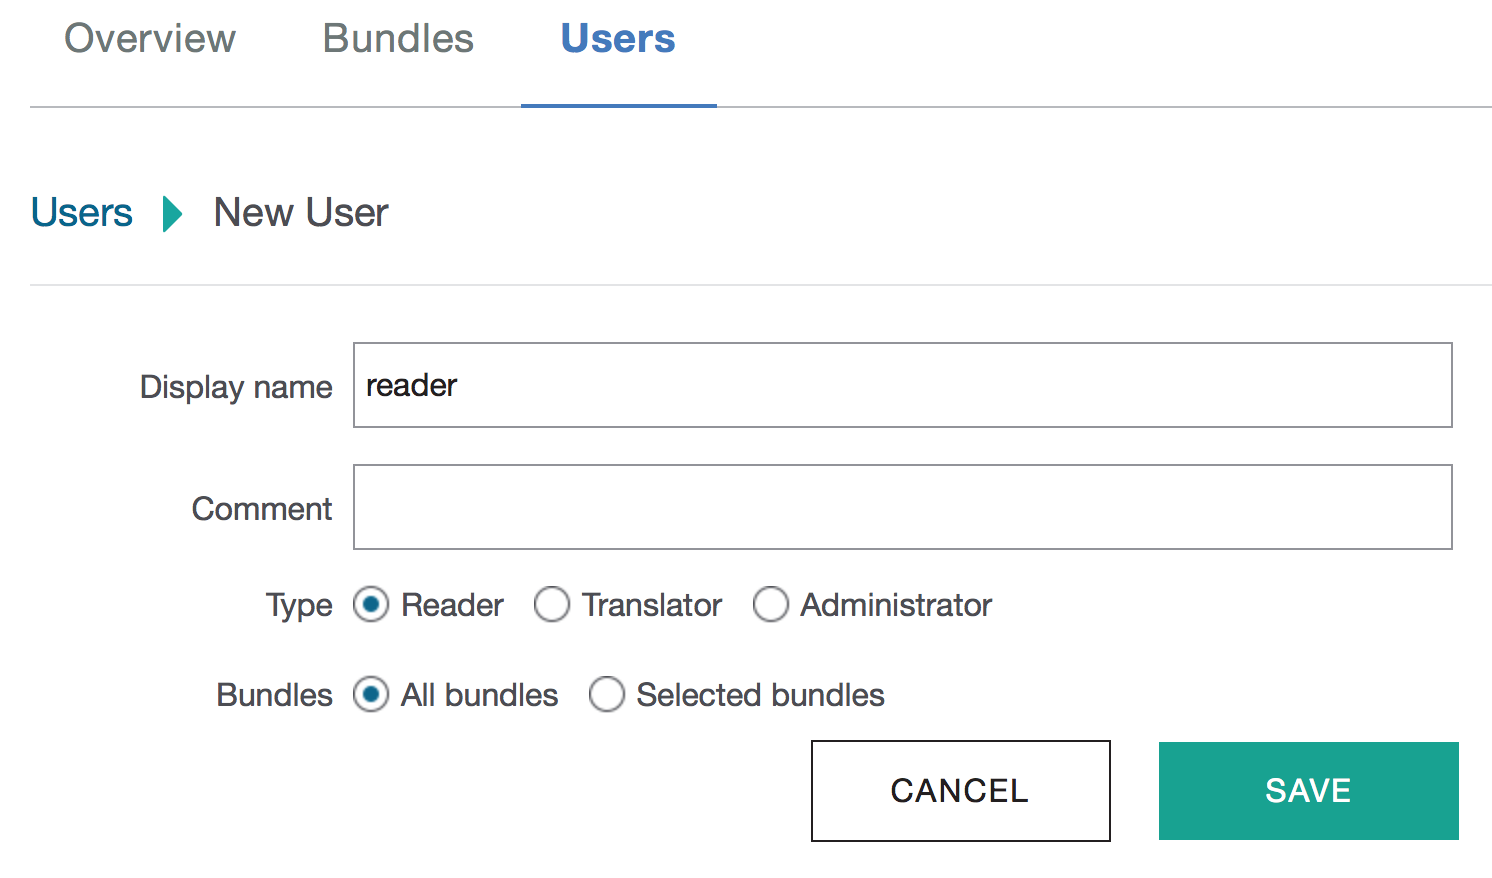
Globalization Pipeline User
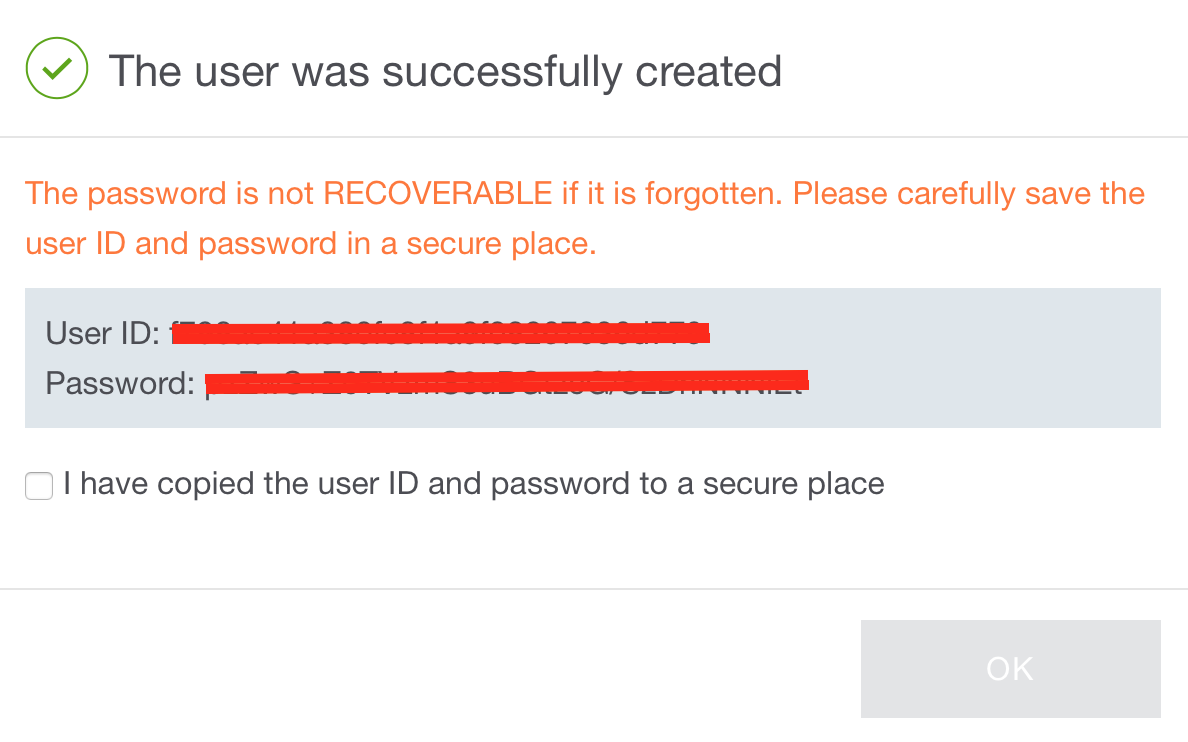
User ID and Password
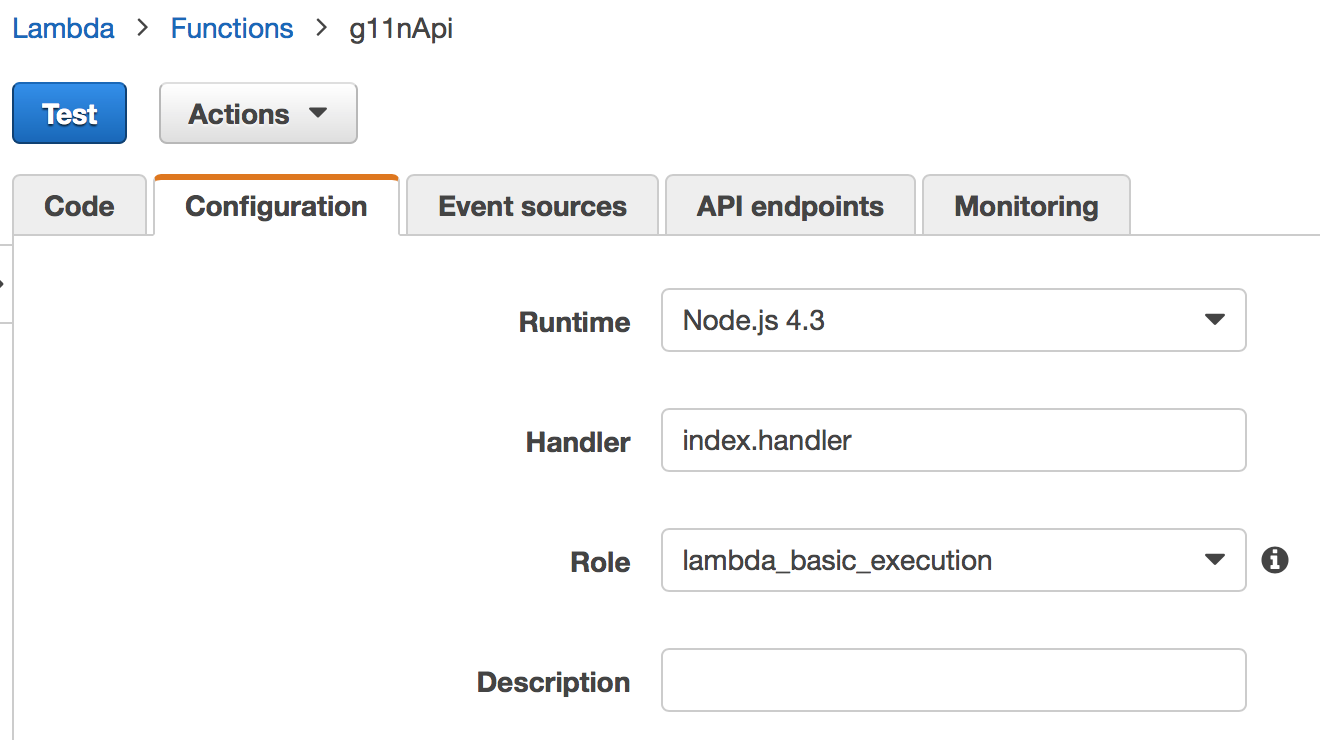
Lambda Configuration
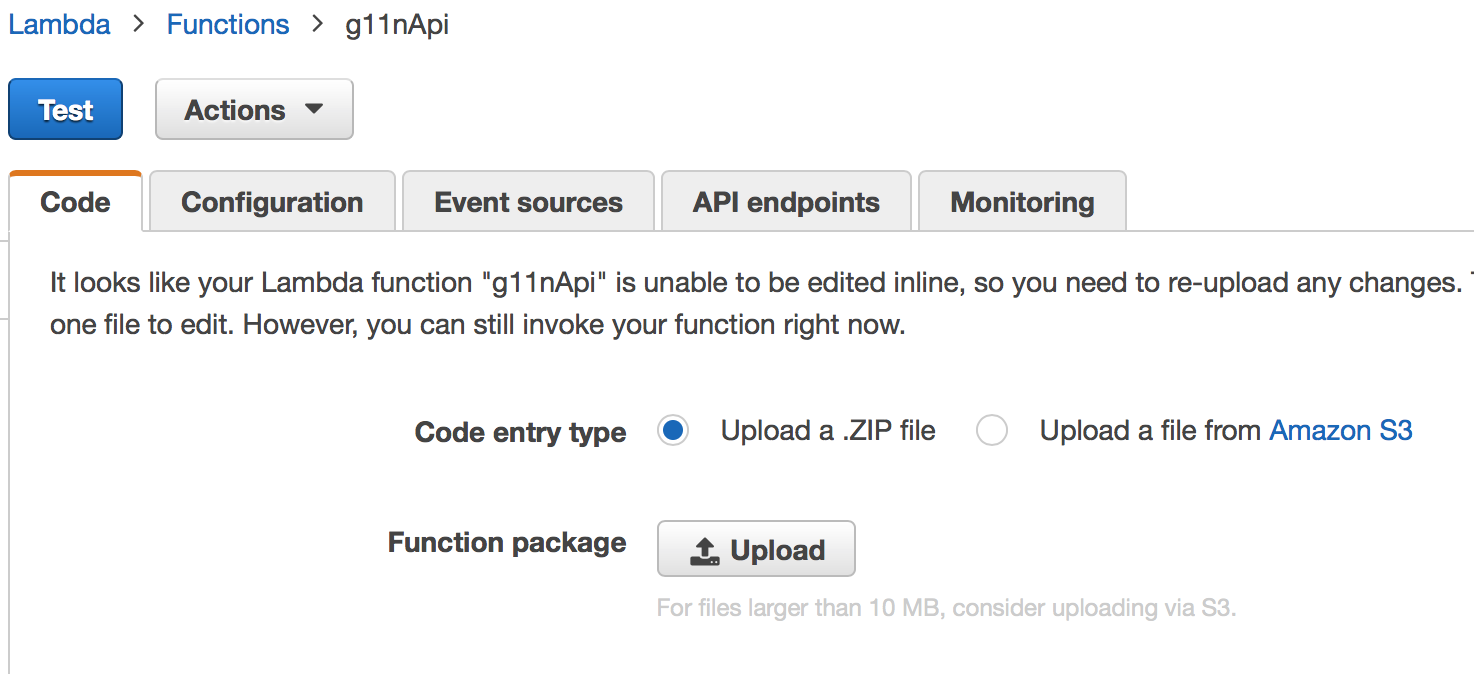
Upload Lambda Code
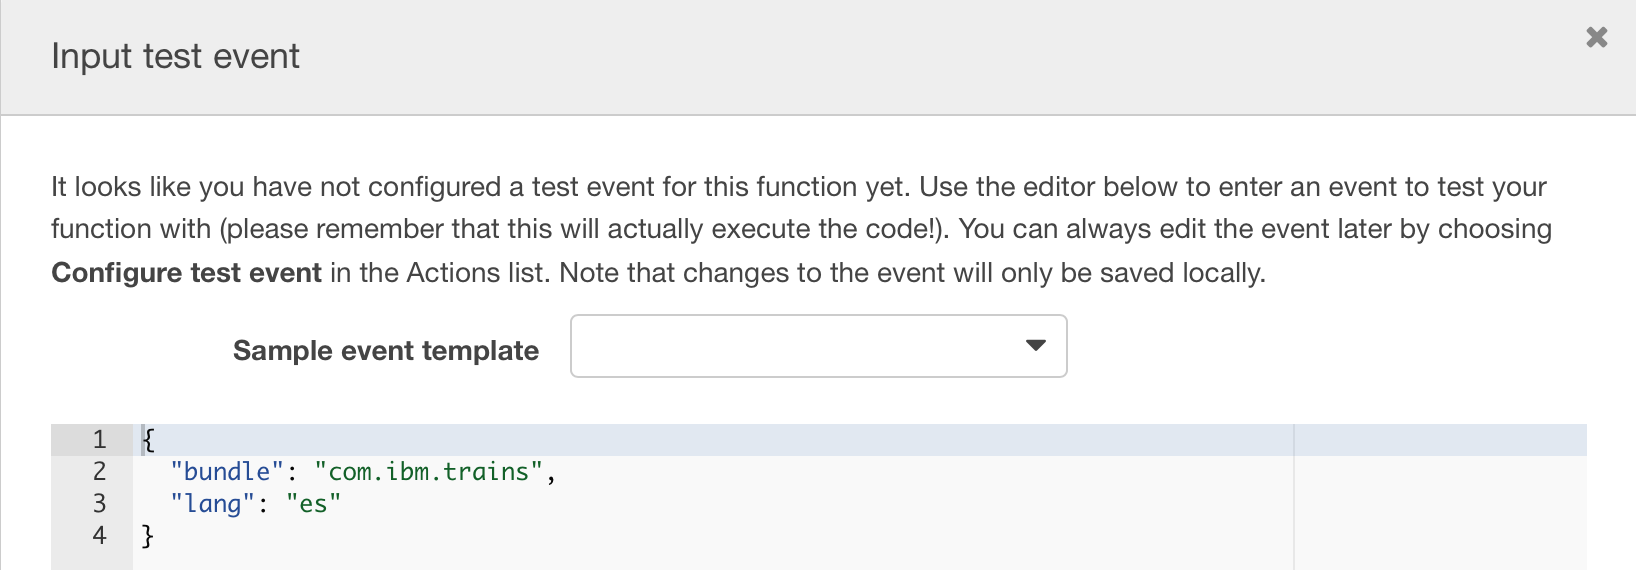
Input Test Event
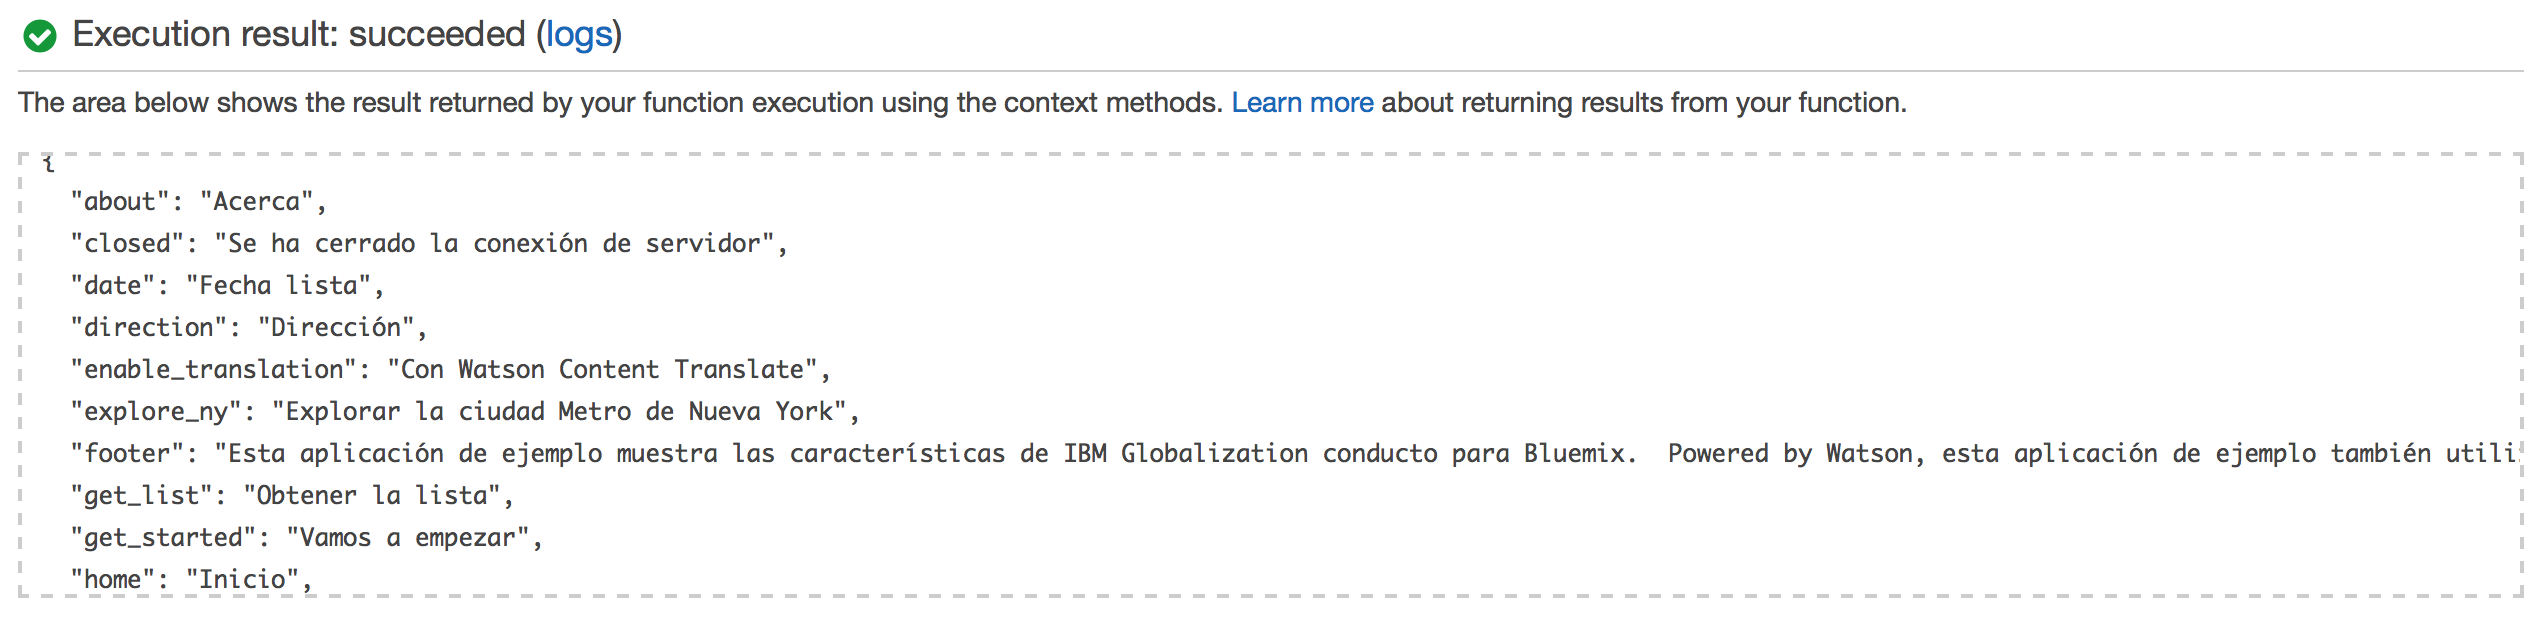
Sample Output
That’s all there is to it. As you can see it is pretty easy to call a Bluemix service from other environments including other clouds.

Hi, guest!

